
|
 04-08-2012, 08:12 PM
|
#11 |
|
Senior Member
Adult
Join Date: Jun 2009
Posts: 5,246
|
Looks great! I love looking at other peoples enclosures taking shape (& pinching ideas! lol ) Im sure George will be very happy with it
|

|

|
|
04-08-2012, 08:18 PM
|
#12 |
|
Member
Hatchling
Join Date: Aug 2012
Posts: 629
|
Got to say I love looking at what others have made as well, I find it a really interesting part of the hobby and Im sure mine will evolve as the years tumble along lol, may even get bigger if the wife doesnt notice lol
|
|
|
|
|
05-08-2012, 09:55 AM
|
#13 |
|
Senior Member
Sub Adult
Join Date: Jul 2010
Location: UK / Eng / Yorkshire
Posts: 1,483
|
Amazing, well done, yours torts have a truly 5* bungalow there, Just wondered if you take lodgers!!
You could have the first tortoise B & B in Britain! Nay, the world even. Gongrats Sue |
|
|
|
|
05-08-2012, 03:36 PM
|
#14 |
|
Member
Hatchling
Join Date: Aug 2012
Posts: 629
|
Hahaha now Sue there is a thought lol
|
|
|
|
|
21-08-2012, 09:05 PM
|
#15 |
|
Member
Hatchling
Join Date: Aug 2012
Posts: 629
|
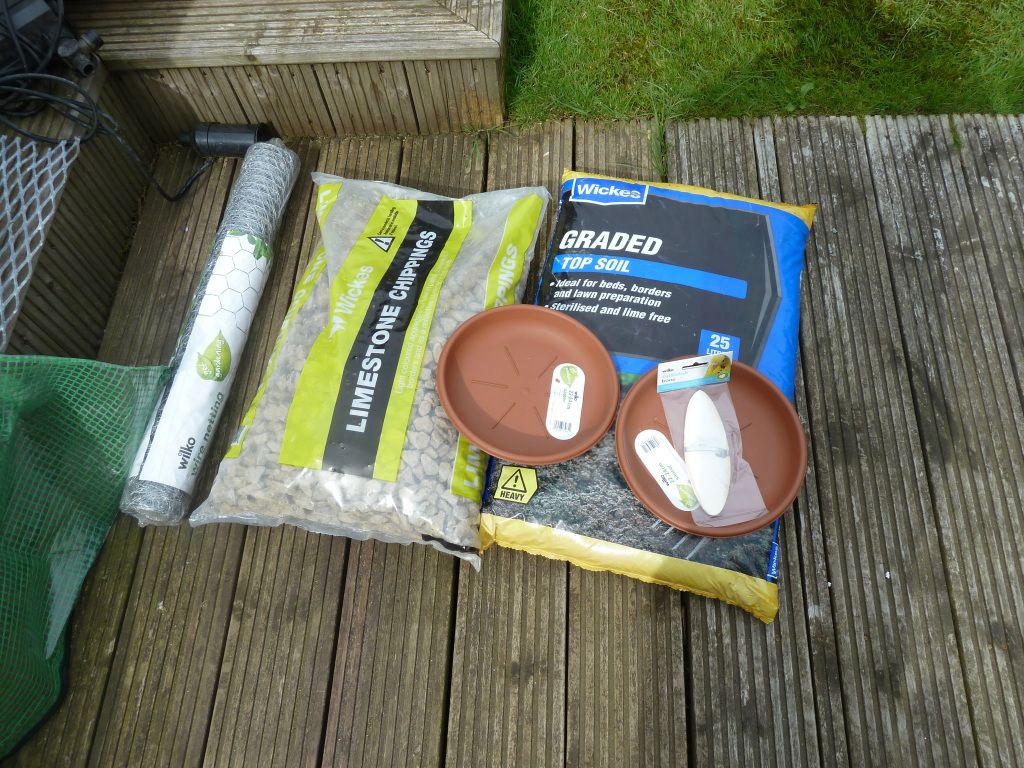
I bought a few more supplies today, a drink bowl which is really just a plastic plant pot dish from Wilkinson's 98p that someone mentioned on this site, thank you for that, limestone chippings to mix in with the top soil, extra wood, cuttlefish and some mesh to make the boundary around my garden a bit more secure, I bought the mesh from Wilkinson's as well, 10 metres for £9 the same sort of mesh from Wickes was £22.
  Finished insulating the tort den and double skinning it added the slide on lid with the plastic cover.  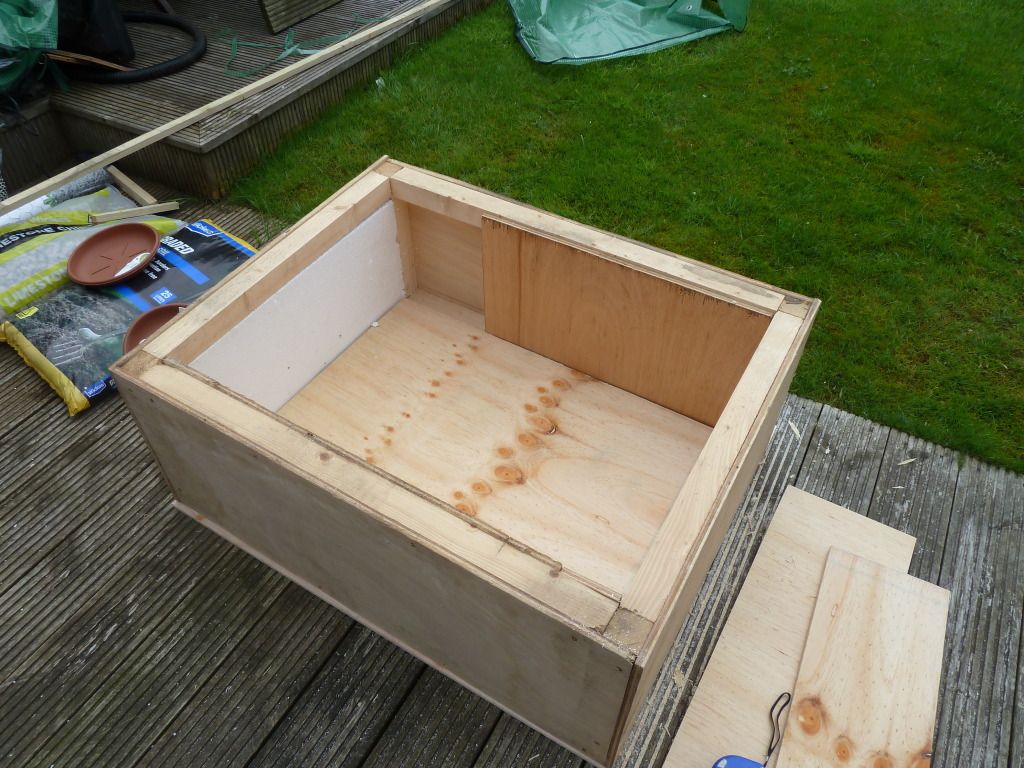 I added a ramp and a bit of a wind break inside and filled it up with the top soil so she can bury herself down at night, not sure about this bit but thought that is the more natural way but this might change, also cut the hole as it would be no good without one lol. I think a tube heater might be another way to go in the den for chilly days, I also thought the the top soil would be safer with a heater than soft material that could catch fire.  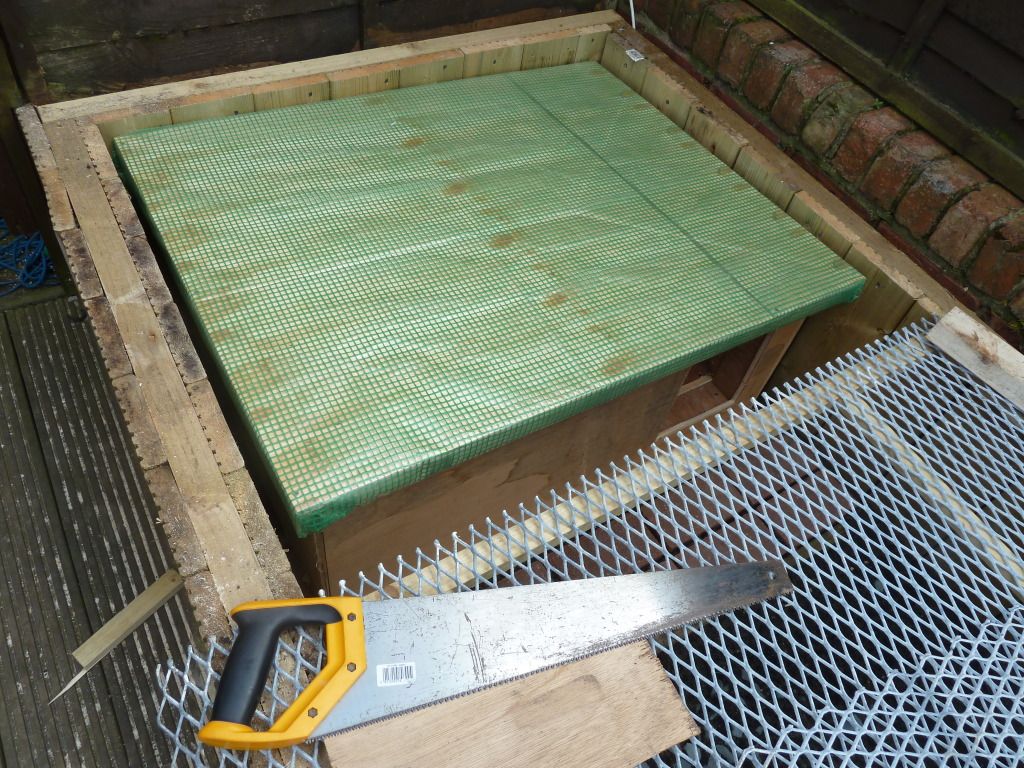 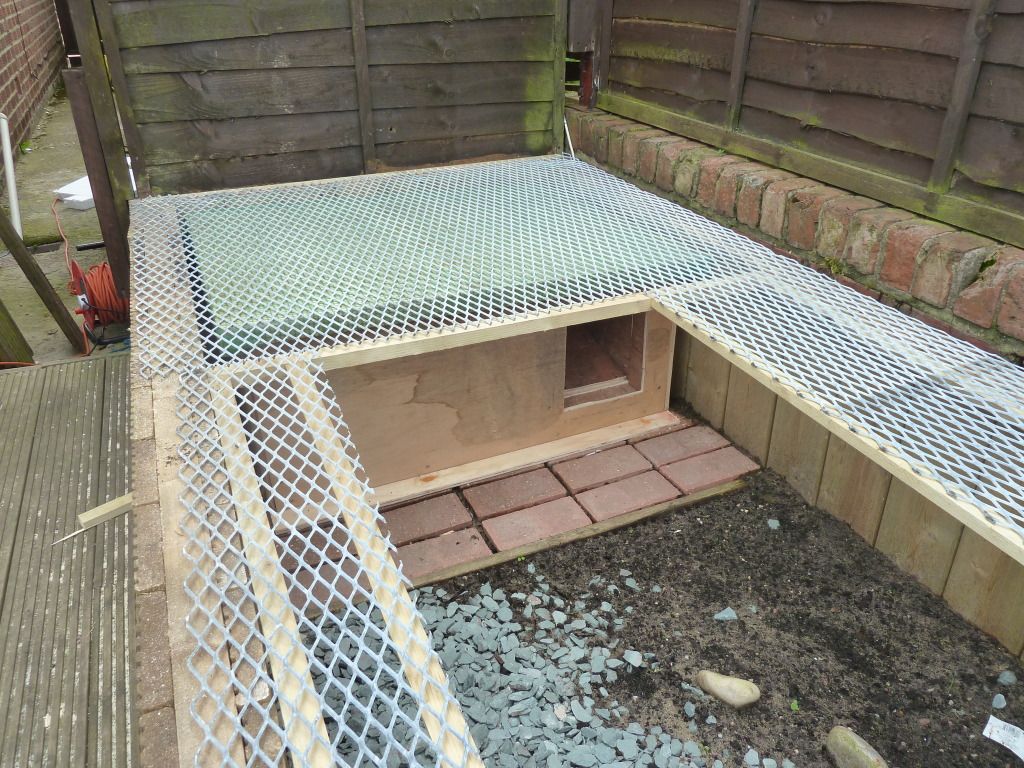 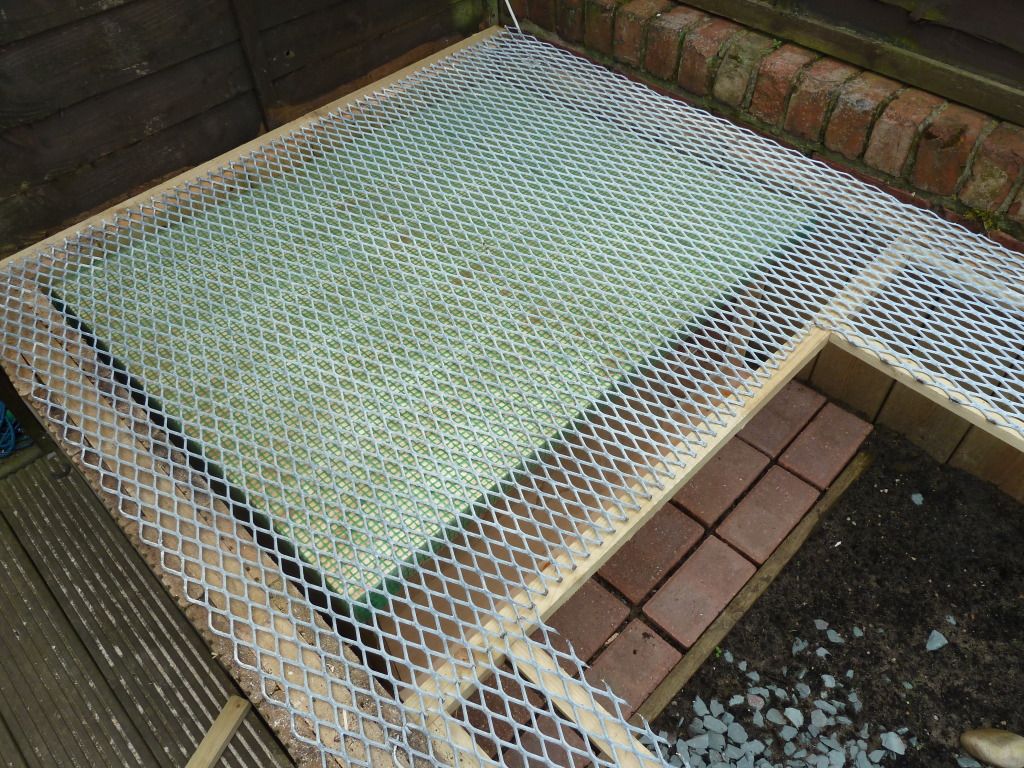 I cut the hatch above the den roof so I can get access for cleaning , the roof slides forward. If you look at the back you can see the protective cover rolled up, 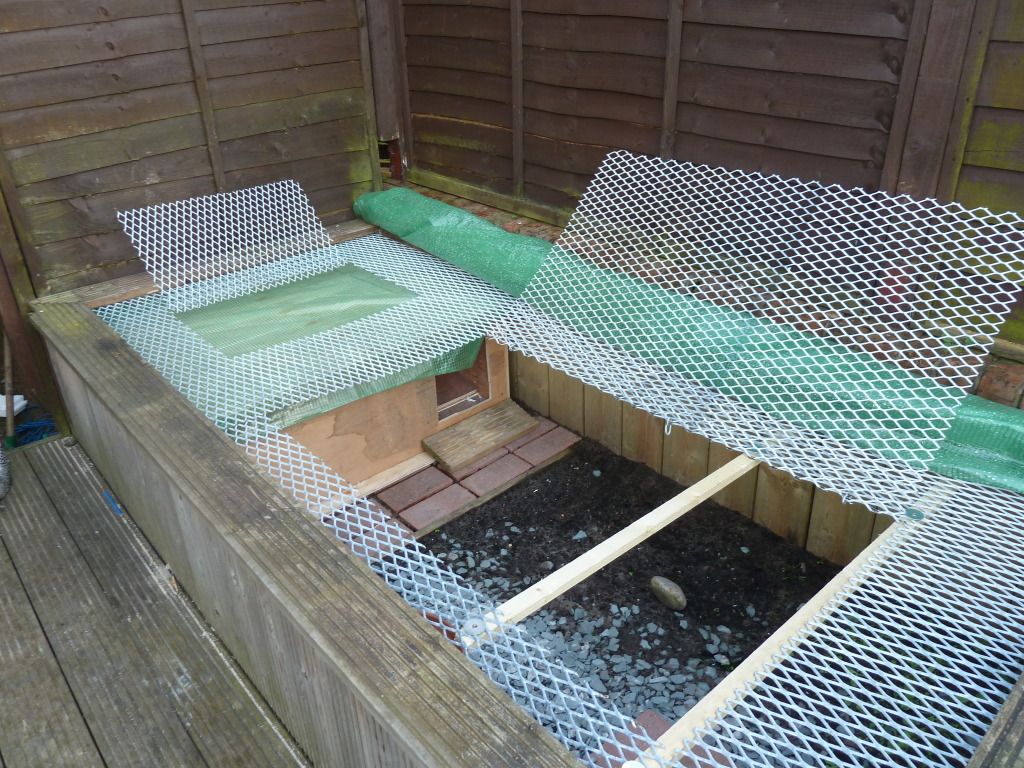 In this picture you can see the protective cover which will be used on bad days and at night, it doesn't look it but it is very see through its actually used for a green house. The only thing left to do is cut the hole in the side of the enclosure so she can come and go. 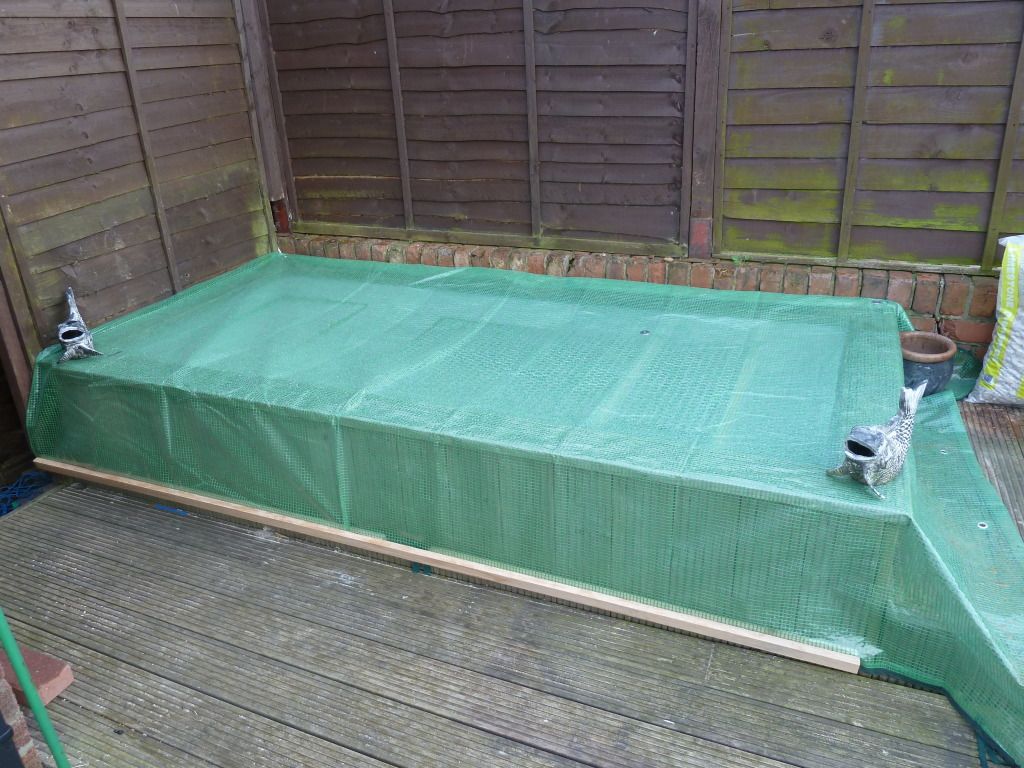 So all good to go, the hole will be cut into the side tomorrow and Im going to spend a few days getting some food supplies then we are ready to go. |
|
|
|
|
21-08-2012, 09:17 PM
|
#16 |
|
Senior Member
Adult
Join Date: Dec 2008
Location: Bristol
Posts: 7,157
|
That looks AWESOME!!!! xx
|
|
|
|
|
21-08-2012, 09:20 PM
|
#17 |
|
Super Moderator
Adult
Join Date: Oct 2007
Location: Hampshire
Posts: 11,157
|
Do you know, it never fails to amaze me the care, thought and attention some people give to their enclosures. Daryn, you have done a terrific job there, well done you
__________________

|
|
|
|
|
21-08-2012, 09:23 PM
|
#18 |
|
Member
Hatchling
Join Date: Aug 2012
Posts: 629
|
Thanks folks
|
|
|
|
|
21-08-2012, 09:24 PM
|
#19 |
|
Senior Member
Adult
Join Date: Jun 2009
Posts: 5,246
|
Brilliant! Lots of thought & hard work - one very lucky tort
Just one thing, did you put a barrier (lino or plastic would be fine) between the top soil & wooden floor inside her box? If not might be an idea, so you can dampen the soil if it gets dry/dusty |
|
|
|
|
21-08-2012, 09:28 PM
|
#20 |
|
Member
Hatchling
Join Date: Aug 2012
Posts: 629
|
I didnt to be honest but could always scoop it out and do that, a good point actually I didnt even think about it as I thought it would just be dry all the time with it being covered.
|
|
|
|
 |
| Currently Active Users Viewing This Thread: 1 (0 members and 1 guests) | |
|
|


 Linear Mode

